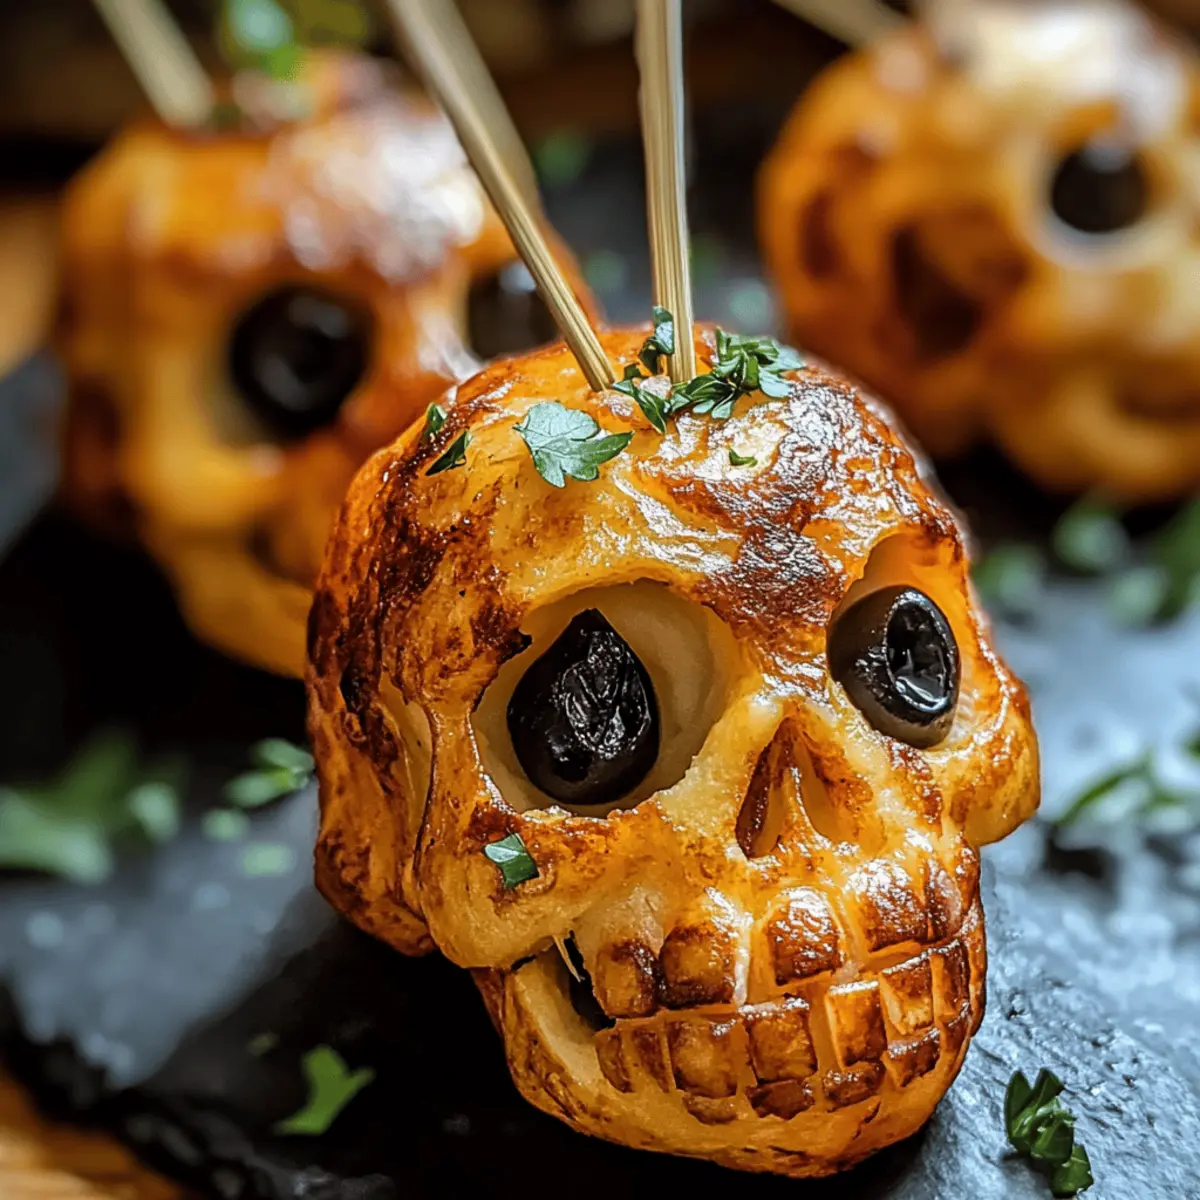
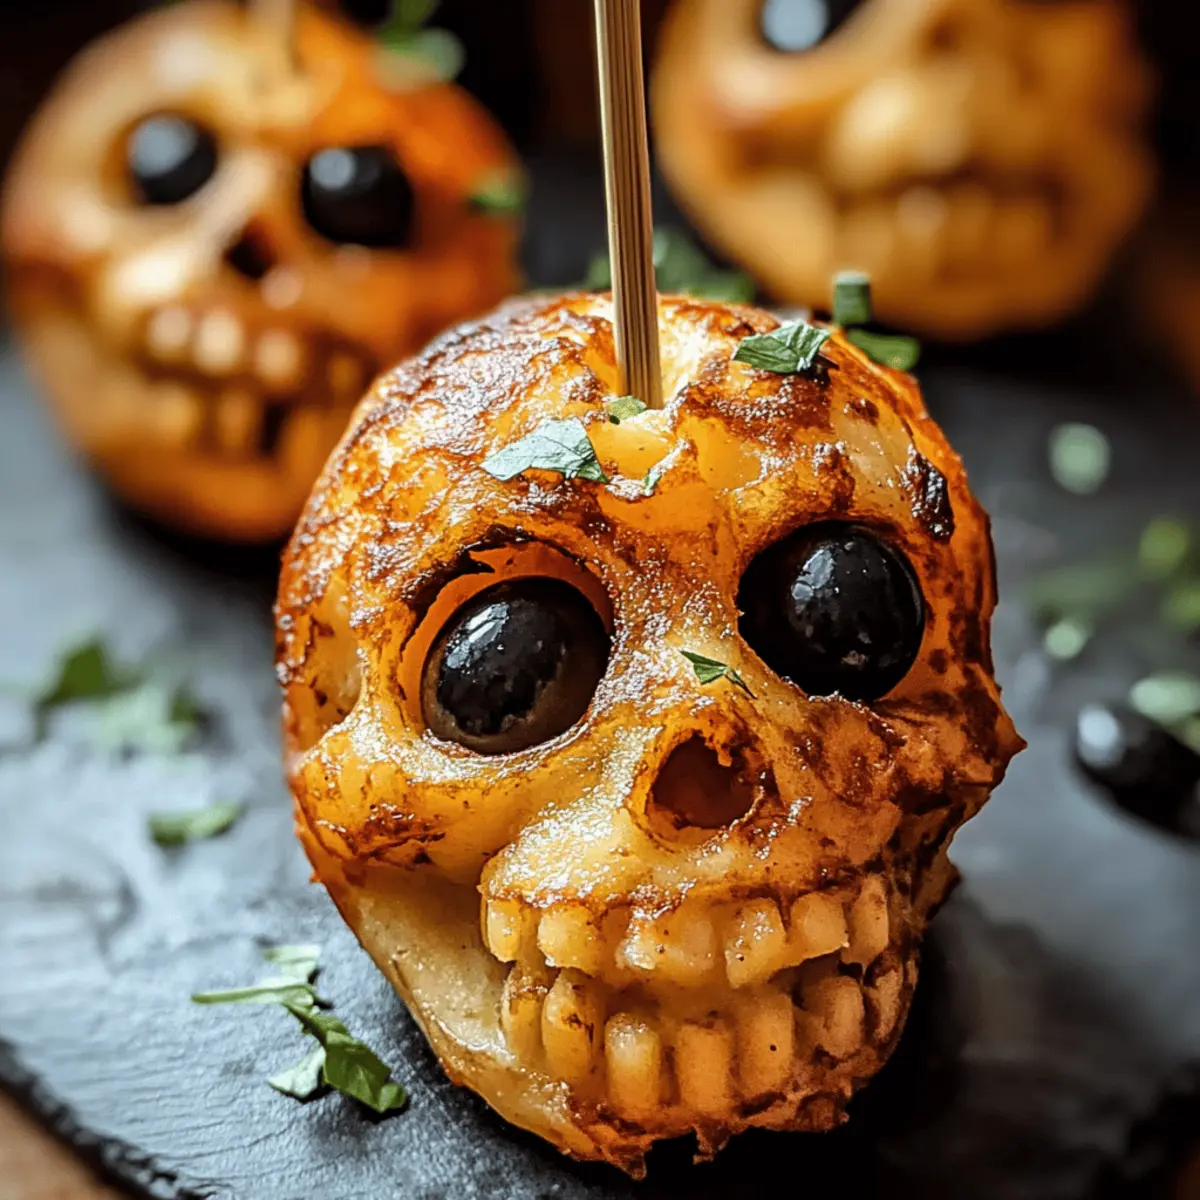
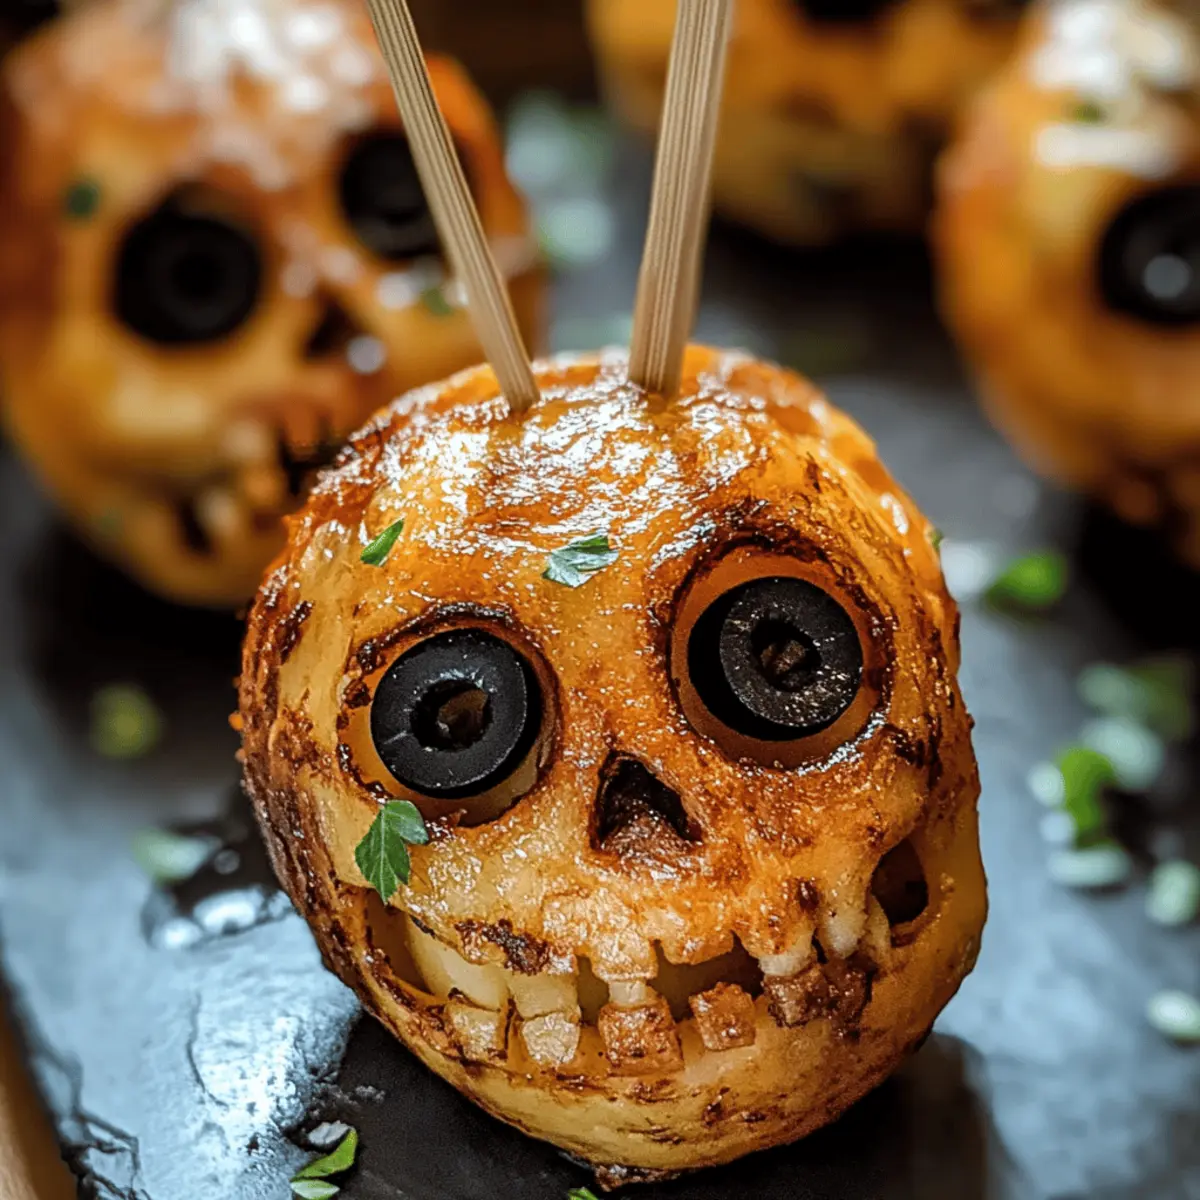
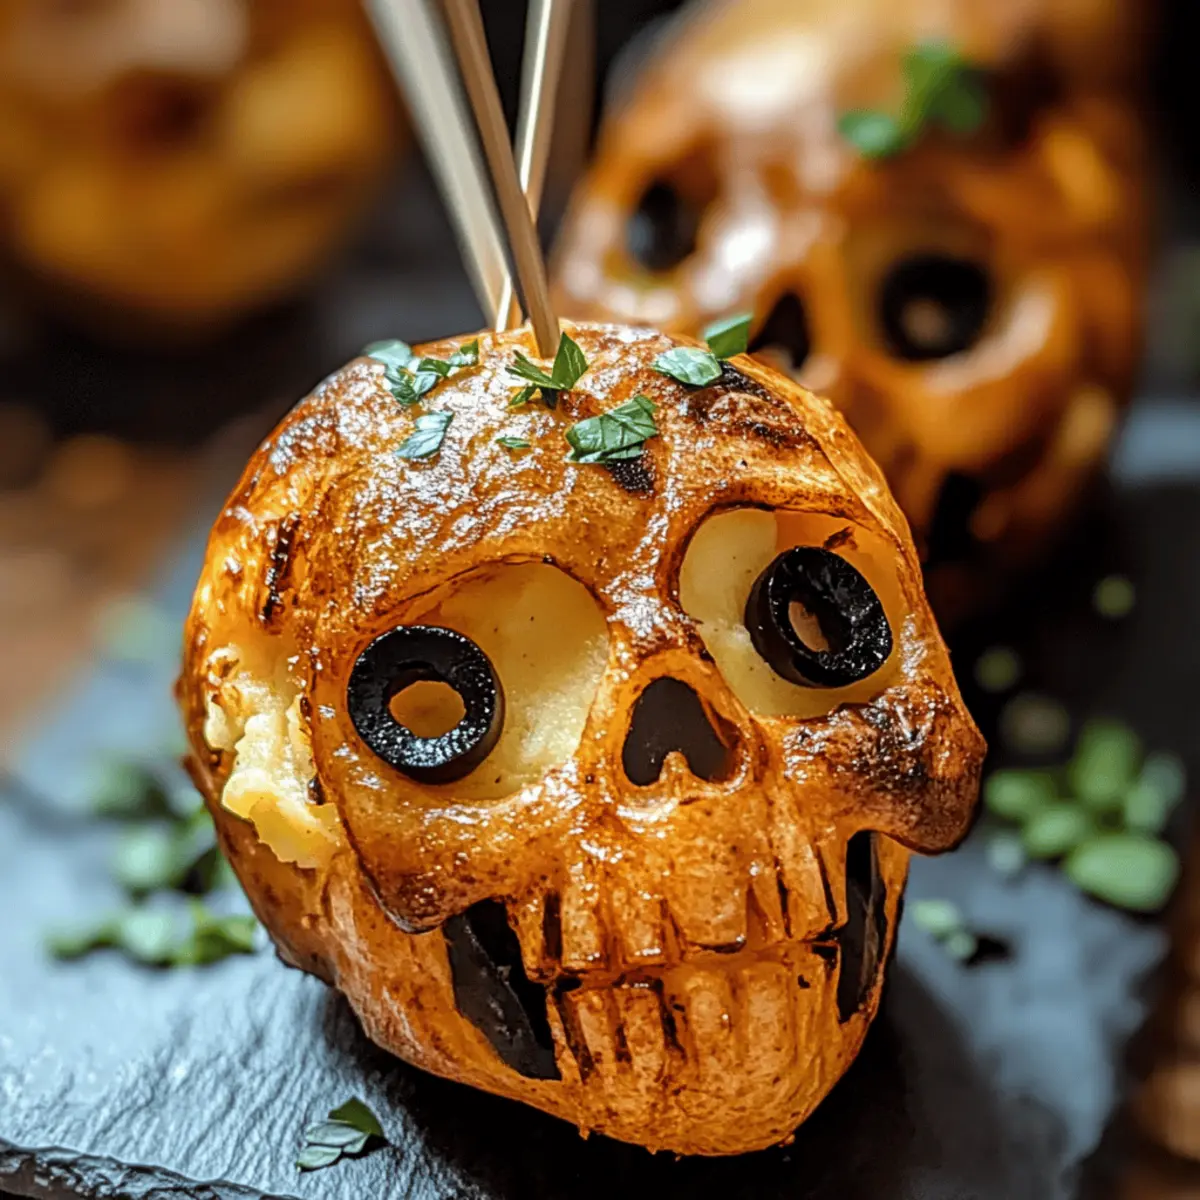
As the leaves turn and a chill fills the air, I can’t help but dive into the kitchen to create something fun and festive for Halloween. Introducing my Spooky Skull Potatoes—a creamy, rich delight that’s sure to steal the spotlight at any gathering! These playful mashed potatoes not only bring comfort food to a new, whimsical level but are also incredibly easy to customize for any flavor or spooky theme you desire. Imagine serving up these delightfully shaped skulls to kids and adults alike and watching their faces light up in surprise! Perfect for Halloween parties or cozy family dinners, this recipe proves that delicious and fun can go hand in hand. Are you ready to whip up some smiles this season?

Why Are Spooky Skull Potatoes a Must-Try?
Festive Fun: These Spooky Skull Potatoes not only taste delicious but also add an element of surprise to your Halloween feast! Serve them warm, and watch the delight on your guests’ faces as they dig into these playful creations.
Customizable Flavor: You can easily personalize this recipe with options like garlic or cheese! For additional flair, consider using molds to create other spooky shapes, such as bats or pumpkins.
Creamy Comfort: The combination of heavy cream, butter, and potatoes ensures that each bite is mouthwateringly rich and creamy—a comfort food experience that everyone will appreciate.
Quick Prep: Ready in just under an hour, these potatoes are perfect for busy cooks looking to impress! Pair them with easy sides like Garlic Butter Potatoes for a complete, festive meal.
Kid-Approved: The playful design makes these potatoes a hit with kids! Serve them at Halloween parties, alongside dishes like Mississippi Chicken Potatoes, to keep both children and adults coming back for more.
Spooky Skull Potatoes Ingredients
For the Potatoes
• Potatoes – Use large russet potatoes for a wonderfully creamy texture that holds its shape well.
• Heavy Cream – Adds a rich, velvety feel; substitute with milk if you’re looking for a lighter version.
• Butter – Enhances the flavor and adds to creaminess; feel free to use olive oil for a dairy-free touch.
• Salt & Pepper – Essential for flavor enhancement; adjust to suit your taste preferences.
For Decorating
• Black Olives – Perfect for creating spooky eyes; swap them out with cooked peas for a colorful twist or use edible gel dye for extra fun.
• Fresh Chives/Green Onions – Optional for a garnish that adds a pop of color; parsley can also work as a great substitute.
Each bite of these Spooky Skull Potatoes promises creamy deliciousness that is sure to delight at your Halloween gatherings!
Step‑by‑Step Instructions for Spooky Skull Potatoes
Step 1: Prepare Potatoes
Begin by peeling and chopping large russet potatoes into 2-inch chunks for even cooking. Place the potato chunks into a large pot filled with salted water and bring to a boil over medium-high heat. Cook the potatoes for 15-20 minutes, or until they are fork-tender, making sure to stir occasionally to prevent sticking.
Step 2: Mash
Once the potatoes are tender, drain them thoroughly in a colander before returning them to the pot. Add in butter and heavy cream, then season with salt and pepper to taste. Use a potato masher to mix everything together, mashing until the mixture is smooth and creamy. This silky texture is the perfect base for your delightful Spooky Skull Potatoes.
Step 3: Shape Potatoes
To create your spooky skull shapes, you can use a skull mold or form them by hand. Spoon the creamy mashed potato mixture into the mold or shape them by hand, packing them tightly to ensure they hold their form during baking. Don’t be shy—make them as playful as possible!
Step 4: Decorate
Now it’s time to bring your Spooky Skull Potatoes to life! Use black olives to create eerie eyes and a mischievous mouth, placing them carefully on the top of each shaped potato. For an extra dash of festivity, garnish with finely chopped fresh chives or green onions to add a pop of color and enhance the presentation.
Step 5: Bake
Preheat your oven to 375°F (190°C). Once ready, carefully place the molded potatoes on a baking sheet lined with parchment paper. Bake them in the preheated oven for 15-20 minutes, or until the tops are golden and slightly crispy, providing a perfect contrast to the creamy interior. Enjoy watching them puff up beautifully!

Make Ahead Options
These Spooky Skull Potatoes are perfect for meal prep enthusiasts looking to save time on busy Halloween evenings! You can prepare the creamy mashed potato mixture up to 24 hours in advance by completing Steps 1 and 2. Simply store the mashed potatoes in an airtight container in the refrigerator to maintain their freshness. Additionally, you can shape the potatoes into skulls and refrigerate them for up to 3 days before baking. When you’re ready to serve, preheat your oven and bake the shaped potatoes straight from the fridge—no need for thawing. This method ensures you’ll have deliciously spooky sides ready to impress your guests with minimal effort!
What to Serve with Spooky Skull Potatoes
Brighten your Halloween feast with flavors and textures that dance around these delightful, creamy treats.
-
Roasted Brussels Sprouts: These crispy, caramelized bites offer a savory contrast to the rich potatoes, balancing the meal beautifully.
-
Garlic Butter Chicken: Juicy chicken infused with garlic and herbs makes for a lovely centerpiece; the warmth complements the skull potatoes perfectly!
-
Cheesy Broccoli Casserole: Creamy and cheesy, this casserole adds a comforting touch while bringing vibrant color to your Halloween table.
-
Autumn Salad: A fresh mix of greens, nuts, and seasonal fruits provides a refreshing crunch, balancing the hearty potatoes with vibrant flavors.
-
Harvest Apple Cider: This sweet and spiced drink pairs wonderfully with the savory elements of the meal and enhances the festive spirit.
-
Pumpkin Spice Brownies: Finish off with these decadent desserts that echo the season’s flavors, creating a sweet ending to your spooky feast.
Each of these pairings brings something unique to the table, ensuring that your Halloween gathering is warm, festive, and utterly delicious!
Spooky Skull Potatoes Variations & Substitutions
Feel free to let your creativity shine and customize these spooky delights to suit your taste!
-
Garlic Mashed: Mix in roasted garlic for a savory twist; the warm aroma will elevate your potatoes to a new level of deliciousness. You can also combine it with a hint of cheese for an irresistible flavor explosion.
-
Cheesy goodness: Stir in shredded cheddar or mozzarella for a rich, melted surprise inside your potatoes. This addition creates a gooey texture that pairs wonderfully with the creamy base, making each bite even more indulgent.
-
Colorful Creations: Add a few drop of food coloring to your potatoes to create vibrant hues that will dazzle your guests. Imagine serving blue or purple skulls— what a fun surprise for kids!
-
Herb-Infused: Incorporate fresh herbs like rosemary or thyme into your mashed potato mixture for a fragrant flavor boost. The aroma of herbs combined with creamy potatoes creates a comforting and cozy dish that’s perfect for fall.
-
Spicy Kick: For those who appreciate a bit of heat, sprinkle in some cayenne pepper or diced jalapeños. These can bring an exciting zing to your Spooky Skull Potatoes, making them a thrilling bite for spice lovers!
-
Savory Swaps: Exchange black olives with cooked peas to create colorful eyes, or use edible gel dye for a whimsical touch. This playful twist not only looks fabulous but also provides a fun surprise for those indulging in your creation.
-
Different Shapes: Instead of skulls, use other Halloween-themed molds like bats or pumpkins for a creative spin. This adds variety to your presentation and allows for multiple spooky treats at your gathering!
-
Flavor Enhancements: Consider drizzling these potatoes with a flavorful gravy or sauce, such as a rich mushroom sauce or a tangy barbecue glaze. These additions add moisture and amplify the deliciousness of the potatoes, making them a hit at any meal.
Feel free to pair your Spooky Skull Potatoes with sides like Garlic Butter Potatoes or Mississippi Chicken Potatoes to complete your festive feast! Enjoy experimenting and making this recipe uniquely yours!
Expert Tips for Spooky Skull Potatoes
-
Perfect Texture: Avoid overcooking the potatoes; this ensures they’re fluffy and not mushy. Test for doneness using a fork to keep that creamy look.
-
Pack Tightly: When shaping your Spooky Skull Potatoes, pack the mashed mixture tightly in molds. This helps maintain the skull shape during baking, preventing collapse.
-
Season Well: Don’t forget to taste and adjust your seasonings! Bland potatoes can fall flat—bring out their best flavors with enough salt and pepper.
-
Creative Decorations: Use fun substitutions for the black olives, such as colorful cooked peas or edible gel dye, to create unique presentations that pop on the table.
-
Reheating Tips: To retain that creamy texture, reheat any leftovers in the oven rather than the microwave. This keeps them warm and maintains their deliciousness!
Storage Tips for Spooky Skull Potatoes
Fridge: Store leftover Spooky Skull Potatoes in an airtight container for up to 3 days. This keeps them fresh and ready to be enjoyed again!
Freezer: If you want to preserve them longer, these potatoes can be frozen for up to 2 months. Ensure they are tightly wrapped in plastic wrap and placed in a freezer bag to prevent freezer burn.
Reheating: When ready to enjoy, reheat in a preheated oven at 350°F (175°C) for about 15-20 minutes or until heated through, preserving their creamy texture and delightful shape.
Serving Leftovers: For an extra touch, consider sprinkling some fresh chives before serving again to keep them visually appealing and flavorful!

Spooky Skull Potatoes Recipe FAQs
What kind of potatoes should I use for Spooky Skull Potatoes?
I recommend using large russet potatoes! They provide the best creamy texture and hold their shape well when mashed, ensuring your skulls look perfect for Halloween.
How should I store leftover Spooky Skull Potatoes?
Store any leftover Spooky Skull Potatoes in an airtight container in the fridge for up to 3 days. Just reheat in the oven to keep their delicious, creamy texture intact!
Can I freeze Spooky Skull Potatoes?
Absolutely! You can freeze these fun potatoes for up to 2 months. Just wrap them tightly in plastic wrap, place them in a freezer bag, and make sure to remove as much air as possible. When you’re ready to enjoy, thaw overnight in the fridge, then reheat in the oven.
What if my mashed potatoes turn out too dry?
If your mashed potatoes seem dry, don’t worry! You can add a bit more heavy cream or butter to the mixture while mashing to reach your desired creaminess. Just incorporate gradually until you achieve a smooth, rich consistency.
Are Spooky Skull Potatoes suitable for people with dietary restrictions?
Yes! You can easily modify this recipe for dietary considerations. For a dairy-free version, simply substitute heavy cream with a plant-based alternative like almond milk and use olive oil instead of butter. For gluten-free needs, rest assured that this recipe contains no gluten ingredients.
Can I use other decorations instead of black olives?
Very much so! If black olives aren’t your thing, you can swap them with colorful cooked peas for a vibrant look or use edible gel dye for fun, spooky decorations. The more, the merrier!

Creamy Spooky Skull Potatoes for a Fun Halloween Feast
Ingredients
Equipment
Method
- Begin by peeling and chopping large russet potatoes into 2-inch chunks. Place them into a large pot filled with salted water and bring to a boil over medium-high heat. Cook for 15-20 minutes, or until fork-tender.
- Drain the potatoes thoroughly and return to the pot. Add butter and heavy cream, then season with salt and pepper. Mash until smooth and creamy.
- Use a skull mold or form them by hand, packing the creamy mixture tightly to hold its shape during baking.
- Use black olives to create eyes and a mouth on the shaped potatoes. Garnish with finely chopped chives or green onions.
- Preheat the oven to 375°F (190°C). Place molded potatoes on a baking sheet and bake for 15-20 minutes, until tops are golden and slightly crispy.

Leave a Reply